




Floor day.
The floor layer arrived to lay the acoustic underlay and floating floor on our latest project. And a few small decisions made a big difference.
A floating floor is laid over an underlay and clicks together without being glued or nailed to the subfloor. It’s quick, it’s affordable and it’s a favourite in apartments. But get a couple of decisions wrong and it’s the first thing anyone notices.
Here are the five I’d plan before your floor layer turns up.
Before Floating Floor Installation Day
Check your strata by-laws first
In an apartment, flooring isn’t just a design decision.
Hard floors carry noise to the neighbours below. In NSW, installing or replacing hard floors in a strata unit counts as a minor renovation under section 110 of the Strata Schemes Management Act 2015, which needs owners corporation approval. Many by-laws also set what acoustic underlay you must use.
Check before you order. Then get approval in writing.
Let the boards settle in
Most manufacturers ask you to leave the boxes in the room for a day or two before laying, so the boards adjust to the temperature and humidity. Some ask for longer.
It’s boring. Do it anyway. Boards that move after they’re laid can gap or lift.
Five Decisions on Floor Day
1. Which way the boards run
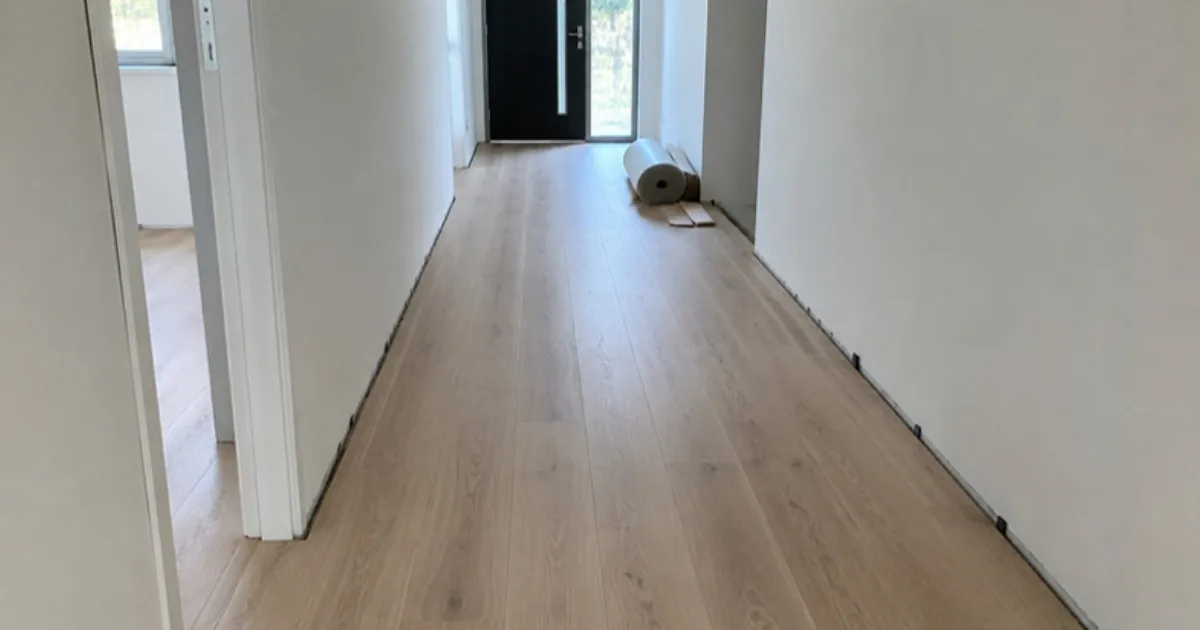
We ran them lengthways down the hallway.
Otherwise, the minute you walk in the front door, you’re greeted by a row of short cuts. Not a good look.
The usual rule is to run boards along the longest wall or the main line of sight – the way you see the room as you walk in. In a home with a long hallway, that’s usually the hallway.
Stand at the front door before you decide. That’s the view buyers and guests get first.
2. The joiner and floor layer work together
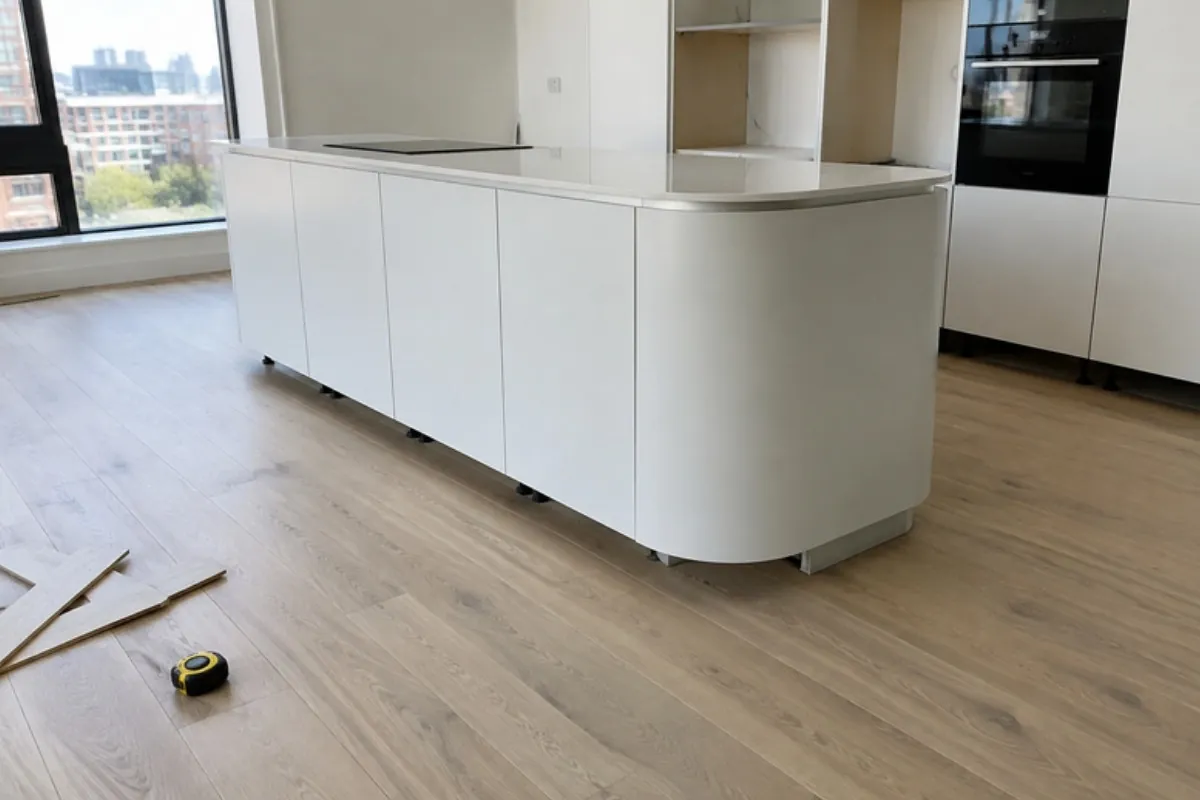
This one saves money and looks better.
Our joiner left the kickers and the curved ends of the island off until the floor was down. So the floor runs underneath.
No scribing. No horrible scotias.
It takes a phone call between two trades and a bit of planning. It’s worth it.
3. Leave the expansion gap
A floating floor moves with the seasons. It needs a gap around the edges, usually around 10mm, hidden under skirting or trims.
Product guides vary, and some ask for more in humid areas or sunny, glassy rooms. Use the gap in your floor’s own installation guide.
Skip it and the floor can buckle on the first hot, humid day.
4. Choose the right underlay
The underlay sits between your subfloor and the boards. It softens footsteps, smooths small bumps and, in an apartment, keeps the noise down for the people below.
We used an acoustic underlay. In a strata building, that’s often non-negotiable.
5. Protect what’s finished
Once the floor is down, everything else is a risk to it.
We put carpet offcuts outside the carpeted bedrooms for shoes. And doubled them up under the appliances, so they don’t dent the carpet.
Cheap, quick and much easier than fixing a scratch.
When the Plan Changes
And the honest bit?
Normally, the floor goes down after the painter’s first coat. That way, drips and ladders don’t land on new boards.
But the painter got sick. So here we are.
We protected the floor, and the painter will work around it.
Renovating rarely goes to plan. The trick is having one.
Get the Floor Right the First Time
Floating floor installation is one of the fastest wins in a renovation. Done well, it lifts the whole home.
Plan the direction from the front door. Get your joiner and floor layer talking. Leave the gap, use the right underlay and protect it once it’s down.
And in an apartment, check the by-laws first.
For more on getting the small details right, read the tiny detail that screams “budget reno” and our tips and tricks on apartment renovations. If you’re planning a renovation and want help with the order of works, book a discovery call.
Floating Floor Installation: Your Questions Answered
Which way should floorboards run?
Usually along the longest wall or the main line of sight from the front door. In a home with a long hallway, running them lengthways avoids a row of short cuts at the entry.
How big should the expansion gap be for a floating floor?
Often around 10mm, but it varies by product and climate. Follow your floor’s installation guide.
Do I need strata approval for a floating floor?
In NSW, installing or replacing hard floors in a strata unit generally needs owners corporation approval. Check your by-laws, including any acoustic underlay rules.
Should flooring go down before or after painting?
Ideally after the painter’s first coat, so drips and ladders don’t damage new boards. If that’s not possible, protect the floor well.